

Painting kitchen cabinets can look like a simple weekend project, especially after watching a few online tutorials. Remove the doors, clean, sand lightly, prime, paint, reinstall. In a ten-minute video, an old kitchen seems to transform almost instantly.
But cabinet refinishing is rarely that simple. A video can't see what your cabinets are made of, the condition of the existing finish, how much grease is embedded in the surface, the humidity in your home, or whether your primer and paint are compatible.
Here are the 10 most costly mistakes we see South Florida homeowners make, and how to avoid them.
One of the biggest mistakes is assuming every cabinet is solid wood. In reality, cabinets are built from many different materials, and each one needs a different preparation process:
Solid wood tolerates more sanding than MDF. MDF must be handled carefully, because too much sanding or moisture damages its smooth surface and makes the fibers swell. Laminate and melamine are slick, non-porous surfaces that need specialized bonding primers. Thermofoil is the most challenging: if the vinyl covering is already lifting, painting over it is rarely a reliable long-term solution.
Choose the wrong sanding method, primer, or coating, and the project may look beautiful at first, while adhesion problems appear weeks or months later. That's why professional refinishing always starts with one question: What material are we working with?
Buying a paint sprayer doesn't automatically create a professional finish. Most tutorials use small consumer sprayers that don't have the control or fine atomization that cabinet doors require.
Professionals use fine-finish spray equipment and adjust it for the coating, the surface, and the conditions that day: pressure, fluid flow, fan pattern, distance, speed, overlap, and viscosity. Get those wrong and you'll see:
The result depends on the experience of the person holding the gun: how the coating behaves, how much to apply, how fast to move, and how to avoid overloading corners and decorative details.
Choosing a product just because it's advertised as "powerful" is one of the most common DIY mistakes. A cleaner that works on one surface can soften or discolor a finish, damage thermofoil or laminate, or raise the fibers of exposed MDF on another.
Residue is the other hidden problem. Many household cleaners leave behind waxes, oils, silicone, fragrances, or soaps that are hard to rinse off. The cabinet looks clean, but the primer can't bond properly, causing fisheyes, craters, bubbling, or early peeling.
A professional chooses the cleaner based on the cabinet material, the existing finish, the type of grease, and the primer and coating that come next, then rinses and lets the surface dry completely. The right degreaser is not the strongest one. It's the one that cleans without interfering with adhesion.
Some homeowners barely sand because a product says "no sanding required." Others sand so aggressively they damage the doors.
The goal is usually not to remove every layer of the old finish, but to create a clean, uniform surface the next product can bond to. Too much sanding can cut through veneer, expose MDF fibers, or round off details. Too little leaves a glossy surface that prevents adhesion. The right amount depends on the material, the existing finish, previous repairs, and the primer and coating being used.
Primer is not an optional coat. It's the bond between the cabinet and the finish. The right primer depends on the material, the existing coating, the color change, and any wood tannins or stains that can bleed through.
A primer for raw wood may not work on laminate, and a general wall primer may not have the adhesion or stain-blocking cabinets need. The wrong choice leads to peeling, chipping, yellow or brown stains, uneven color, and problems with the topcoat.
Cabinets are touched, cleaned, opened, and closed every day, and they're exposed to moisture and grease. Regular wall paint may look good at first, but it isn't built for that level of wear.
A cabinet coating needs adhesion, hardness, washability, chemical and moisture resistance, and blocking resistance, which keeps painted surfaces from sticking together where doors touch the frames. The wrong product stays soft, scratches easily, feels sticky, or wears through around handles and edges.
It looks faster, but leaving doors on the cabinets almost always means missed edges, paint buildup near hinges, drips, painted hardware, and doors that stick after drying.
Professionals remove, label, and finish every door and drawer front separately. Labeling matters: without a numbering system, doors and hinges end up in the wrong place and never align properly again.
Even a perfect spray technique produces a poor finish in the wrong environment. Dust settles in wet paint. Humidity slows drying and curing. Heat makes the coating dry before it levels.
This is especially important in South Florida, where heat and humidity change quickly. Spraying in an open garage or outdoors exposes the finish to dust, insects, moisture, and wind, leading to rough finishes, uneven sheen, soft coatings, wrinkling, and poor adhesion. Professionals work in a controlled environment and monitor conditions before, during, and after application.
Drying means the surface no longer feels wet. Curing is the longer process in which the coating reaches its full hardness. Reinstall too soon and you'll get fingerprints, scratches, dents, hardware marks, sticking doors, and paint transferring between surfaces. Fresh doors also shouldn't be stacked without proper spacing and protection.
When the finish starts peeling, feels rough, or the doors stick together, fixing a DIY job often costs more than doing it right the first time. A failed coating usually can't just be painted over: it may need to be stripped, sanded, repaired, sealed, reprimed, and repainted. In severe cases, the doors must be replaced.
Add the cost of supplies, equipment rental, primer, paint, sanding materials, protection, replacement hardware, and your time. The cheapest option at the beginning is not always the cheapest option in the end.
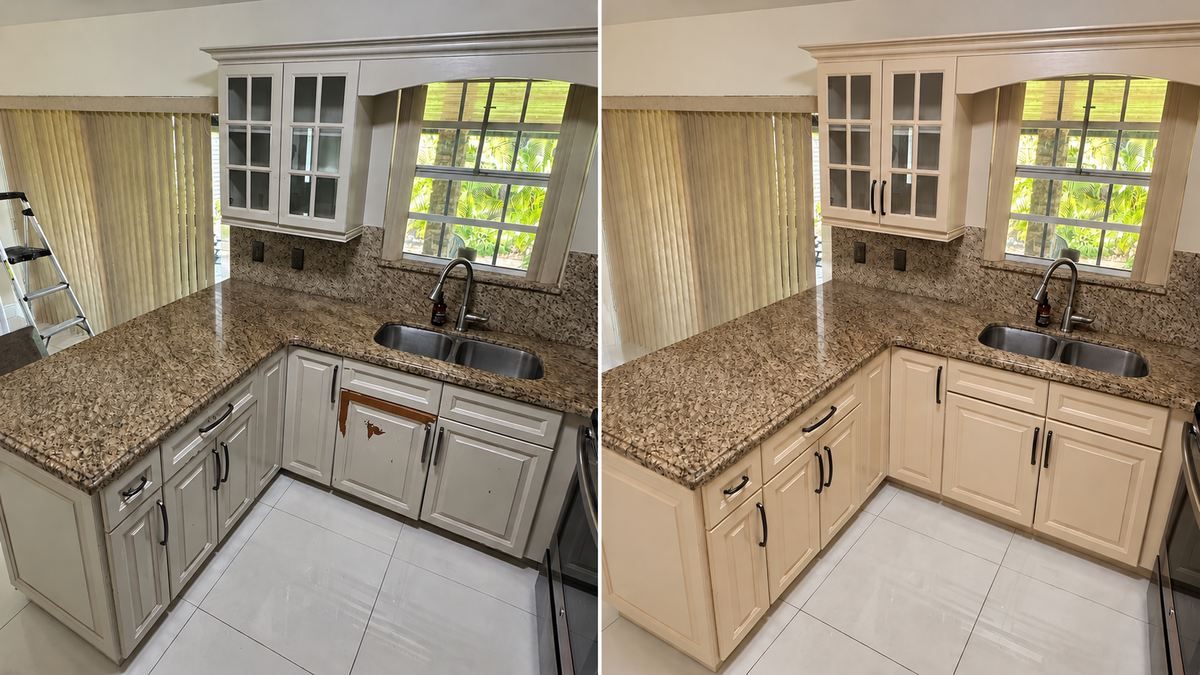
YouTube is great for learning the general steps, comparing colors, and understanding the process. But a tutorial can't diagnose the cabinets in your home. It can't tell whether your doors are solid wood, MDF, veneer, laminate, or thermofoil, test the existing coating, or measure the humidity where you'll be working.
Most videos also end the day the project is finished. They rarely come back six months later to show whether the paint is still bonded, whether the doors have chipped, or whether the finish has gone soft around the handles.
The important part isn't knowing the steps. It's knowing how to adapt them to each kitchen.
The quality of a cabinet project depends on the work done before the final coat is sprayed. A professional result requires:
You can, but results depend on identifying the material, using the right cleaner, primer, and cabinet-grade coating, and controlling the environment. Most DIY failures come from preparation, not from the paint color.
Peeling usually means poor adhesion: the surface wasn't properly degreased or sanded, the primer wasn't compatible with the material, or the doors were used before the finish cured.
Laminate and melamine can often be painted with the right bonding primer and preparation. Thermofoil that is already peeling or lifting usually isn't a good candidate for paint.
It depends on the coating and conditions. A finish can feel dry within hours but take much longer to fully cure. Professionals plan drying and curing time before reinstalling the doors.
Usually, yes, but it often requires stripping or sanding the failed coating, repairing damage, and refinishing from the primer up, which is why it can cost more than doing it right the first time.
Your kitchen is one of the most-used spaces in your home. Before spending money on supplies or risking damage to your cabinets, talk to a professional who can evaluate the material, condition, and right finishing system for your kitchen.
NEXTCOAT CABINETS PAINTING specializes in kitchen and bathroom cabinet refinishing throughout Broward, Palm Beach, and Miami-Dade: